Introduction
You must have heard about state transition tables. This is great test design technique to let us achieve the right coverage when testing with GUI application. We analyze the application from its states perspective to be able to adjust the coverage we can achieve according to resources we have available. In this part about GUI automation I will show how easy we can adapt the testing framework to use it.
Details
We have a framework at this point available which has a DSL layer and it looks very nice (as shown HERE). What we can test at this point (from test design technique point of view) is actually one test case decision table like this:
| action | TC 1 |
|---|---|
| GIVEN().tab().isOpened(). | X |
| WHEN().tab().isWritten(text). | text = “text1” |
| AND().tab().contentIsCopied(). | X |
| THEN().clipboardContent().shouldBe(equalTo(text)); | X |
However we need to be able to look on the application from state transition point of view, to be able to act basing on the state transition diagram. We would like to have an automation which can execute state transition diagram by walking the paths we choose.
Let’s look at the example of one – it focuses on the feature LTR/RTL which is text direction left to right and vice versa in Notepad++.
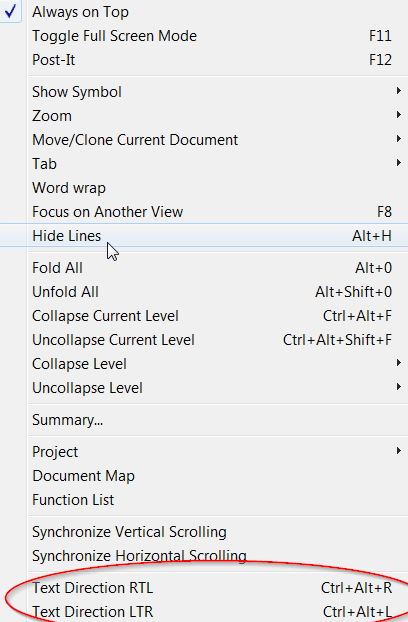
text direction feature in Notepad

State transition diagram with text direction focus
As you can see there is one main state which is one tab selection in Notepad++ (there is always some tab selected). There are also 2 substates which indicate if RTL or LTR is used. So it means when we start using the application we always start with 1 tab selected and LTR text direction. Then, we can change the text direction or do any other transitions like createNewTab, selectTab or deleteTab. I do not want to write here all the state transition diagram details (I hope to create separate post on test design techniques some day) – let’s only say the basic coverage for this technique should be to execute each state and each transition at least once.
We would like to be able to transform this diagram into Java code and introduce one extra layer on top of we already have in the Sikuli testing framework and then run it.
Let’s do it!
Every of 3 states will be represented as separate class in Java:
|
1 2 3 4 5 6 7 8 9 10 11 12 13 14 15 16 17 18 19 20 21 22 23 24 25 26 27 28 29 30 31 32 33 34 |
public class StateTextLTR extends StateTabIsSelected { public StateTextLTR(StateDriver stateDriver, Tabs tab){ super(stateDriver, tab); } public StateTextLTR assertTabIsWritable(){ super.assertTabIsWritable(); return new StateTextLTR(stateDriver, tab); } public StateTextLTR createNewTab(){ super.createNewTab(); return new StateTextLTR(stateDriver, tab); } public StateTextLTR selectTab(Tabs tab){ super.selectTab(tab); return new StateTextLTR(stateDriver, tab); } public StateTextLTR deleteTab(Tabs tab){ super.deleteTab(tab); return new StateTextLTR(stateDriver, tab); } public StateTextRTL changeTextDirection(){ dslLogger.info("Transition: change text direction"); new GivenOrWhenStart(DSLTestCase.testDriver).textDirectionIsChanged("RTL"); stateDriver.setCurrentTextDirection("RTL"); return new StateTextRTL(stateDriver, tab); } } |
|
1 2 3 4 5 6 7 8 9 10 11 12 13 14 15 16 17 18 19 20 21 22 23 24 25 26 27 28 29 30 31 32 33 34 35 36 |
public class StateTextRTL extends StateTabIsSelected{ public StateTextRTL(StateDriver stateDriver, Tabs tab){ super(stateDriver, tab); } public StateTextRTL assertTabIsWritable(){ super.assertTabIsWritable(); return new StateTextRTL(stateDriver, tab); } public StateTextRTL createNewTab(){ super.createNewTab(); return new StateTextRTL(stateDriver, tab); } public StateTextRTL selectTab(Tabs tab){ super.selectTab(tab); return new StateTextRTL(stateDriver, tab); } public StateTextRTL deleteTab(Tabs tab){ super.deleteTab(tab); return new StateTextRTL(stateDriver, tab); } public StateTextLTR changeTextDirection(){ dslLogger.info("Transition: change text direction"); new GivenOrWhenStart(DSLTestCase.testDriver).textDirectionIsChanged("LTR"); stateDriver.setCurrentTextDirection("LTR"); return new StateTextLTR(stateDriver, tab); } } |
|
1 2 3 4 5 6 7 8 9 10 11 12 13 14 15 16 17 18 19 20 21 22 23 24 25 26 27 28 29 30 31 32 33 34 35 36 37 38 39 |
public class StateTabIsSelected extends StateTransitionTestCase{ Tabs tab; public StateTabIsSelected(StateDriver stateDriver, Tabs tab){ super(stateDriver); this.tab = tab; } public StateTabIsSelected assertTabIsWritable(){ new NotepadAssertion().tabIsWritable(); return new StateTabIsSelected(stateDriver, tab); } public StateTabIsSelected createNewTab(){ dslLogger.info("Transition: createNewTab"); new GivenOrWhenStart(DSLTestCase.testDriver).tab().isOpened(); Tabs nextTab = stateDriver.getNextTab(); stateDriver.addAvailableTab(nextTab); stateDriver.setCurrentlySelectedTab(nextTab); return new StateTabIsSelected(stateDriver, nextTab); } public StateTabIsSelected selectTab(Tabs tab){ dslLogger.info("Transition: selectTab"); new GivenOrWhenStart(DSLTestCase.testDriver).tab(tab).isSelected(); stateDriver.setCurrentlySelectedTab(tab); return new StateTabIsSelected(stateDriver, tab); } public StateTabIsSelected deleteTab(Tabs tab){ dslLogger.info("Transition: deleteTab"); new GivenOrWhenStart(DSLTestCase.testDriver).tab(tab).isDeleted(); stateDriver.deleteAvailableTab(tab); return new StateTabIsSelected(stateDriver, tab); } } |
Now we can navigate through the state transition diagram using IntelliJ suggestions and we can make any path we wish. As the result we can adjust the coverage to our needs.
The example test case based on the state transition diagram looks like this:
|
1 2 3 4 5 6 7 8 9 10 11 12 |
@Test public void testTabsAreWritable(){ start(). createNewTab().assertTabIsWritable(). changeTextDirection().assertTabIsWritable(). createNewTab().assertTabIsWritable(). selectTab(new1).assertTabIsWritable(). deleteTab(new2). deleteTab(new3).assertTabIsWritable(). changeTextDirection().assertTabIsWritable(); } |
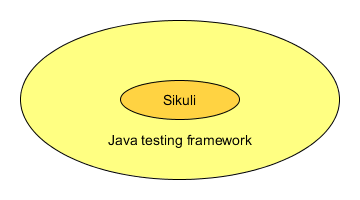
What we test here is we navigate through all the states and transitions at least once and at some point we execute assertTabIsWritable. By doing so, we test if the tab currently selected in the test flow is writable or not. Under the hood we use here Sikuli based testing framework which is described in previous posts.
|
1 2 3 4 5 6 7 8 9 10 11 12 13 14 15 16 |
public class NotepadAssertion { public String text = "Sikuli can automate every kind of GUI."; public void tabIsWritable() { try { new GivenOrWhenStart(DSLTestCase.testDriver).tab().isWritten(text). WHEN().tab().contentIsCopied(). THEN().clipboardContent().shouldBe(equalTo(text)); } finally{ new GivenOrWhenStart(DSLTestCase.testDriver).tab().contentIsCleared(); } } } |
As you can see we are using the existing framework to check if tab is writable. We are focusing only on this feature. We of course could be checking much more: like when executing createNewTab we could be checking if extra tab was created etc. but I skipped it for simplicity sake.
The video goes here:
You may also view the source code which is
HERE under GUI_automation_part4 branch.
Summary
This is just an example of the automation of tests which are basing on state transition diagram. The power of this approach is related to this test design technique. Firstly, if a requirement is described in this way we are ready for automatic testing. Secondly, in my opinion when such a diagrams which decribe specific funcionality exist in the project, it is possible to use them for example for purpose of retesting. If there is a new feature F1 in functionality A1 it is possible to have automated test for the A1 functionality by executing its state transition diagrams to check if nothing is spoiled there by F1.
The great GUI automation summary
So this would be all I wanted to present about GUI automation. This framework in my opinion is extremely flexible. This could be used for any application – not only GUI. This is just a matter of substitution of Sikuli with other thing like some web service self made framework for testing web service application. One could simplify it from programmatic point of view, one could add tests which would be testing framework itself (unit tests), or else improve the DSL layer. Still even such simple version is usable and shows the potential.
I hope that now the tank comparison from the 1. part (HERE) is more clear 🙂